Friday, September 27, 2019

Banana desserts


Ingredients

  • Pastry for single-crust pie (9 inches)
  • 1 cup sugar
  • 1/4 cup cornstarch
  • 1/2 teaspoon salt
  • 3 cups 2% milk
  • 2 large eggs, lightly beaten
  • 3 tablespoons butter
  • 1-1/2 teaspoons vanilla extract
  • 2 large firm bananas
  • 1 cup heavy whipping cream, whipped

Directions

  • On a lightly floured surface, roll dough to a 1/8-in.-thick circle; transfer to a 9-in. pie plate. Trim to 1/2 in. beyond rim of plate; flute edge. Refrigerate 30 minutes. Preheat oven to 425°. Line crust with a double thickness of foil. Fill with pie weights, dried beans or uncooked rice. Bake on a lower oven rack until edges are golden brown, 20-25 minutes. Remove foil and weights; bake until bottom is golden brown, 3-6 minutes longer. Cool on a wire rack.
  • In a large saucepan, combine sugar, cornstarch, salt and milk until smooth. Cook and stir over medium-high heat until thickened and bubbly. Reduce heat; cook and stir 2 minutes longer. Remove from heat. Stir a small amount of hot filling into eggs; return all to pan. Bring to a gentle boil; cook and stir 2 minutes longer.
  • Remove from heat. Gently stir in butter and vanilla. Press plastic wrap onto surface of custard; refrigerate, covered, 30 minutes.
  • Spread half of the custard into crust. Slice bananas; arrange over filling. Pour remaining custard over bananas. Spread with whipped cream. Refrigerate 6 hours or overnight.
I have made banana cream pies and deep dish banana cream pies and they both depend on the amount of time after adding all the in ingredients to make the pastry filling. I cook it until it is very thick and you do have to wait and be patient with the process. It will burn on the bottom if you up the stove temperature. It must be done slowly. I use pillsbury pie crust. Make sure the bottom is cooked otherwise it will be uncooked. I do add a layer of bananas first, then half the pastry cream then another layer of banana and then the last of the pastry cream. It has to cool in the refrigerator for at least 6-8 hours. Put a little lemon juice, just a little, to sprinkle over the bananas to keep from during brown. It’s not a recipe for people in a hurry. That goes for all cream pies.
I usually use a graham cracker crust and pudding to make my banana cream pie and wanted to try one from scratch. This was easy and absolutely delicious. The pie was a hit. The custard was so delicious I was eating it out of the pan. My son liked it so much he asked if he could have some for breakfast because it had bananas in it. I let him this one time. I will make this again and again.
A delicious cream pie for sure, but too sweet for me. I'm adjusting my notes to use 1/2 cup sugar.
It states to use a 9" pie plate, so that's the size of crust. Although a pie dough crust is shown, I have not seen this pie on a buffet in anything other than a graham cracker crust. My step-grandmother loved using a coconut crust for hers.
My husband LOVES this pie rates it a ten. Said it was the best he has ever eaten.
You took a recipie with several important steps and tried to break it down into few steps. This has been the most ridiculous waste of time I have found on internet recipes ! You would be doing a good job if you were thorough. I’ll stay away from this website for a while.
The recipe doesn't say what kind or size of crust to use.
I've never made a banana cream pie and this one was delish! Some of the comments were leading me to believe It may be out of my league, but it was so simple. I doubled the recipe for my deep dish pie plate, used premade pie crust (cheetah), cut the sugar in half, used nonfat milk and loaded that baby with lots of bananas. Thickened up that heavy cream with a bit of powdered sugar and YUM! Use a quality pot to cook your filling, have patience when stirring to thicken and you will rock it out of the park.
The Best pie, banana cream pie EVER. So good I made it twice within 3 day and had to share with friends and family. LOVE Is in the custard. Yum is in the pie!
It takes patience to make custard. Follow the recipe and it makes the very best custard. I am never disappointed by this recipe.

Baked potato soup recipe


Ingredients

  • 4 large baking potatoes (about 12 ounces each)
  • 2/3 cup butter, cubed
  • 2/3 cup all-purpose flour
  • 3/4 teaspoon salt
  • 1/4 teaspoon white pepper
  • 6 cups 2% milk
  • 1 cup sour cream
  • 1/4 cup thinly sliced green onions
  • 1 cup shredded cheddar cheese
  • 10 bacon strips, cooked and crumbled

Directions

  • Preheat oven to 350°. Pierce potatoes several times with a fork; place on a baking sheet. Bake until tender, 65-75 minutes. Cool completely.
  • Peel and cube potatoes. In a large saucepan, melt butter over medium heat. Stir in flour, salt and pepper until smooth; gradually whisk in milk. Bring to a boil, stirring constantly; cook and stir until thickened, about 2 minutes. Stir in potatoes; heat through.
  • Remove from heat; stir in sour cream and green onions. Top servings with cheese and bacon.
I prepared the potatoes a day ahead and kept them in the frig. I made the soup the next day and it only took about 15 minutes.
This seems to be a slightly 'fancier' version of my dad's potato soup, only differences I see he cut potatoes & boiled, then cooked on stove on low for hours. he did the 'healthier' version, cutting the butter & mashing up some of the potato to thicken (towards the end). I do not think he added sour cream. but he did add celery! THAT "made" the soup, imo. and he likely added more pepper. I'm going to try it this way, then dad's. then decide how I need to 'adjust'. he also often used yellow cooking onions if he did not have any scallions. I'll epot back after evaluation. only I'm going to add some celery cut up fine, and maybe some celery seed to this version, as imo, celery in potato soup is 100% necessary.
TASTE WAS PASTY. Not enough flavor. Won't make it again without changing the recipe. Really bland
This is one o boy's favorite soups!!
I made it as directed and if you love pure potato soup taste, I think it's great. I used pink Himalaya salt, so I had to add more regular salt. I will try other additions when I make it again if I want more zip and zest. I would have loved to use California Baker Potatoes, but I can only get those when we're in North Carolina for the summer. They are the best tasting potato I have ever had. I don't see them in Florida and wonder where I can get them.
With the dairy and potatoes, this is probably not a good recipe to freeze.
Can this be frozen ahead of time.
Love this recipe. I made very little changes. I did add more potatoes than it called for as well as used Old cheddar cheese(and lots of it ) for that sharp cheddar flavor. I believe that any recipe is a starting block and we add to it or take away things to make it our own. This recipe need very little adjustment to make my family beg for seconds! And with 5 kids to please, when they all want more, i know I have hit the jackpot with this one!
This recipe is a good start but is really quite bland. I added more salt and pepper, 1 can of chicken broth, 1/4 c chopped onion, and about 1/3 cup of cheddar cheese. So many people gave this a 5 star rating but go on to tell about all the extra ingredients they added. That's not really an accurate rating of the original recipe.
This recipe is flawless! I have shared it so many times!

Tuesday, September 24, 2019

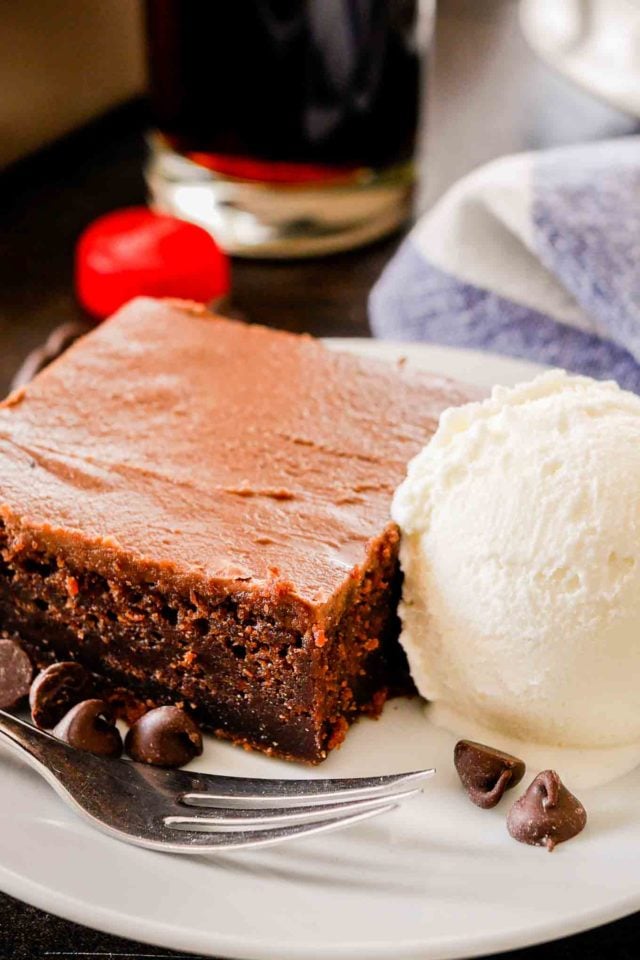
Coca cola cake

Coca cola cake

Ingredients

  • 2 cups all-purpose flour
  • 2 cups sugar
  • 1 teaspoon baking soda
  • 1/2 teaspoon salt
  • 1/2 teaspoon ground cinnamon
  • 1 can (12 ounces) cola
  • 1 cup butter, cubed
  • 1/4 cup baking cocoa
  • 2 large eggs, room temperature
  • 1/2 cup buttermilk
  • 1 teaspoon vanilla extract
  • GLAZE:


  • 1 can (12 ounces) cola
  • 1/2 cup butter, cubed
  • 1/4 cup baking cocoa
  • 4 cups confectioners' sugar, sifted

  • Directions

    • Preheat oven to 350°. Grease a 13x9-in. baking pan.
    • In a large bowl, whisk the first 5 ingredients. In a small saucepan, combine cola, butter and cocoa; bring just to a boil, stirring occasionally. Add to flour mixture, stirring just until moistened.
    • In a small bowl, whisk eggs, buttermilk and vanilla until blended; add to flour mixture, whisking constantly.
    • Transfer to prepared pan. Bake 25-30 minutes or until a toothpick inserted in center comes out clean.
    • About 15 minutes before cake is done, prepare glaze. In a small saucepan, bring cola to a boil; cook 12-15 minutes or until liquid is reduced to 1/2 cup. Stir in butter and cocoa until butter is melted; remove from heat. Add confectioners' sugar; stir until smooth. Pour immediately over hot cake.

    Chipped beef on toast


    Ingredients

    • 8 ounce s Buddig original beef (see notes)
    • 1/4 cup butter
    • 1/4 cup all purpose flour
    • 1/2 teaspoon fresh ground black pepper
    • 2 pinches ground cayenne pepper
    • 2 cup s milk (see notes)
    • salt and pepper to taste

    Instructions

    1. Slice the beef in bite size pieces.
    2. Melt butter in a skillet over medium low heat. Whisk in the flour. Cook for 2 to 3 minutes; whisking constantly. Sprinkle in black pepper and cayenne pepper. Slowly whisk in the milk until smooth and creamy.
    3. Add the chopped beef and simmer for 3-5 minutes. Salt and pepper to taste. Serve over toasted bread, eggs, hash browns, or biscuits.
    • You can use any dried beef or pressed beef. Budding beef can be found in the packaged lunch meat section of your local grocery.
    • If the sauce is too thick whisk in 1/4 cup of milk at a time until desired thickness is reached.

    Tuesday, September 17, 2019

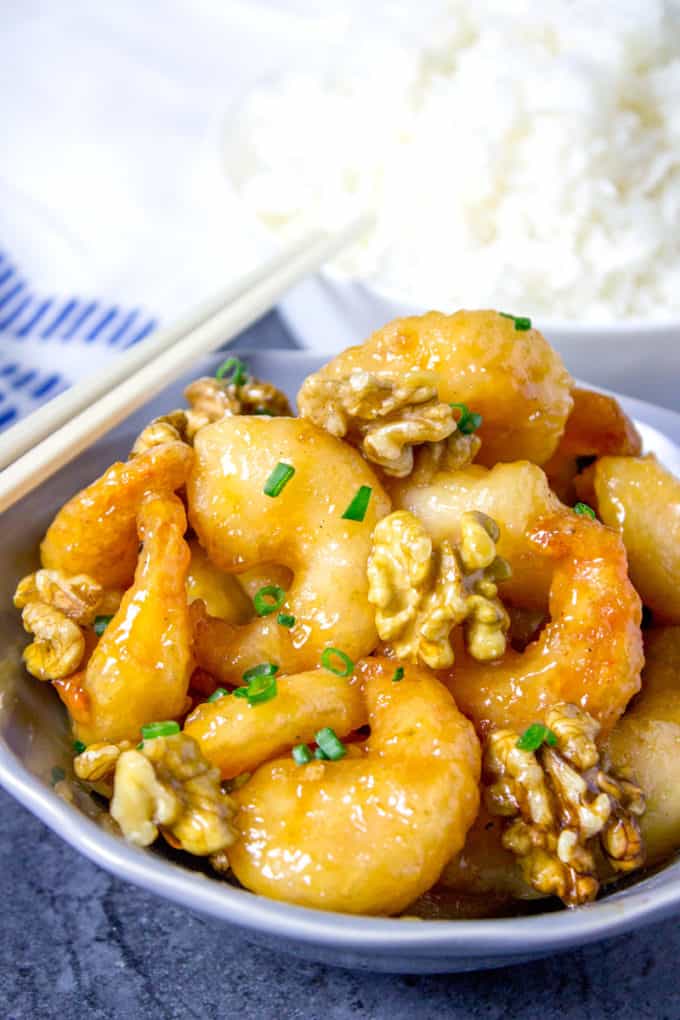
    Honey walnut shrimp

    Honey walnut shrimp

    Ingredients


    • 1 cup water

    • 2/3 cup white-colored sugar

    • 1/2 cup walnuts

    • 4 egg-whites

    • 2/3 cup mochiko (glutinous grain flour)
    • 1/4 cup mayonnaise

    • 1 pound large shrimp, peeled and deveined

    • two tablespoons honey

    • 1 tablespoon canned sweetened condensed milk

    • 1 cup vegetable oil for frying

    • Add all ingredients to list out
    • Add all ingredients to list out

    Directions


    30 m


    1. Stir together water and sugar in a tiny saucepan. Provide a boil and add some walnuts. Boil for just two minutes, then drain and put walnuts on the cookie sheet to dry.

    2. Whip egg-whites inside a medium bowl until foamy. Stir within the mochiko until it features a pasty consistency. Heat the oil inside a heavy deep skillet over medium-high temperature. Dip shrimp in to the mochiko batter, after which fry within the herbal until golden brown, about a few minutes. Remove having a slotted spoon and drain in writing towels.

    3. Inside a medium serving bowl, stir together the mayonnaise, honey and sweetened condensed milk. Add shrimp and toss to coat using the sauce. Sprinkle the candied walnuts on the top and serve.


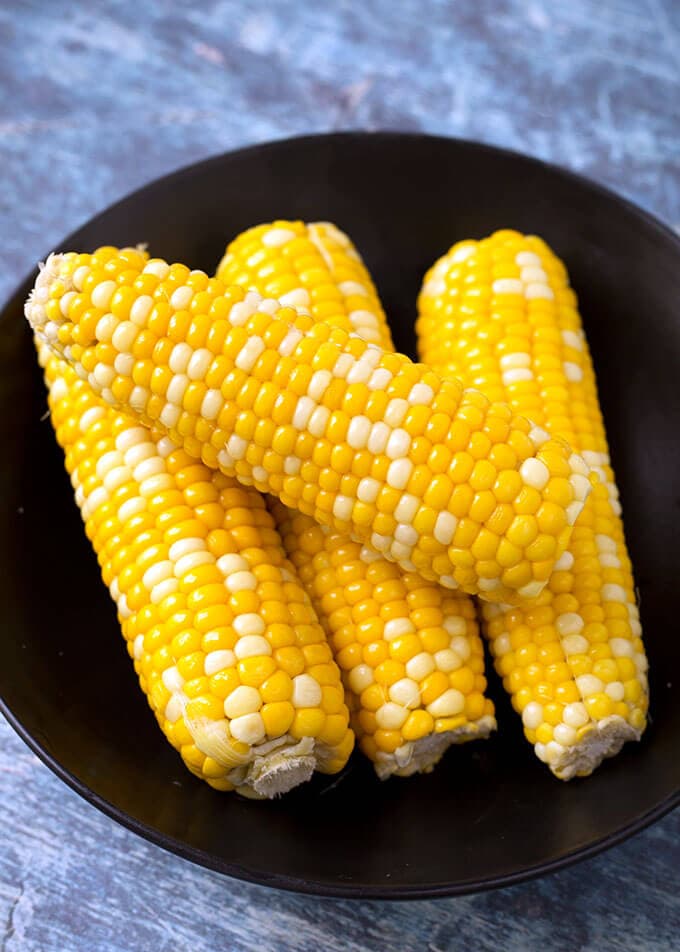
    Corn on the cob

    Corn on the cob

    It is not summer time until you have had corn around the cob. It's at each barbecue, it can make the right side dish to, umm, everything, and unless of course you are Michael Bubl, nobody idol judges you while gobbling one lower with hands. Fortunately, the summer time staple is fast and simple and does not even need picky toppings (unless of course you would like them — we've a lot of fun suggestions for how you can top corn). Only a pat of butter along with a generous seasoning of pepper and salt.

    1. Boil in VERY salty water.

    Make use of the largest pot you've, grow it with water, and salt it really well. Among the first training I recall at culinary school was my chef calling many of us over and getting us taste a spoonful of his pot of salted water. It sampled such as the sea and that he proudly mentioned that each single pot of salted water we use for boiling ANYTHING should taste like this. So you shouldn't be shy. Your corn will not taste salty within the finish — the salt will undoubtedly help enhance its flavor. Take the nicely salted water to some boil.

    2. Shuck it good.

    While your water is warming up, accomplish your corn husks. This could get untidy because of all of the small strings, therefore we recommend doing the work more than a rubbish bin. Beginning in the tip, grab all the husk and because the strings as you possibly can and rip lower. Repeat until all the husk is off. Chafe because the lingering strings as you possibly can. (You'll frequently observe that a hack for taking out the strings is by using a clear toothbrush — we do not purchase it.)

    3. Boil Them quick.

    Using tongs, drop your corn in to the boiling water. Return water to some boil, then prepare your corn for 5-10 minutes. Set a timer if you enable your corn overcook the kernels may become tough. The aim is juicy, crunchy kernels, not mushy dry ones.

    4. Butter up.

    Brush with melted butter, season with pepper and salt, and let summer time begin.


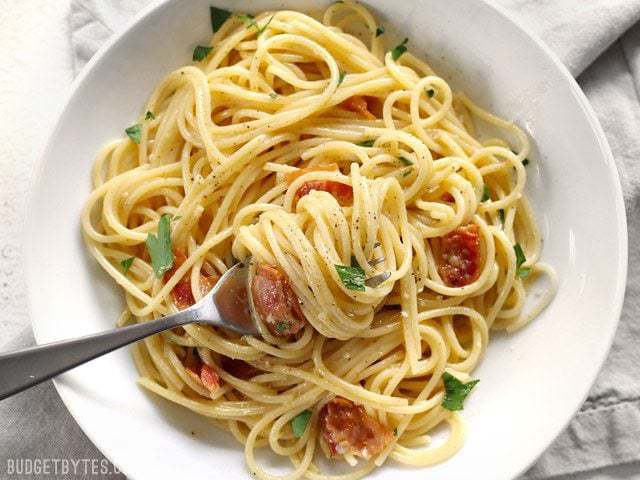
    Pasta carbonara

    Pasta carbonara

    Uncover steps to make superb spaghetti carbonara. This cheesy pasta dish is definitely an Italian favourite along with the right technique, you may make it perfect each time

    Diet and additional info


    • kcal 655

    • fat 31g

    • saturates 16g

    • carbs 66g

    • sugars 0g

    • fibre 3g

    • protein 32g

    • salt 2.02g

    Pancetta


    Pancetta is Italian cured pork belly - the same as streaky bacon. It features a deep, strong,…

    Parmesan


    Parmesan is really a straw-coloured hard cheese having a natural yellow rind and wealthy, fruity flavour. It…


  • 3 large eggs


  • 350g spaghetti


  • 2 plump garlic clove cloves, peeled and left whole


  • 50g unsalted butter


  • ocean salt and freshly grated pepper


  • Method


    Place a large saucepan water onto boil.

    Finely chop the 100g pancetta, getting first removed any rind. Finely grate 50g pecorino cheese and 50g parmesan and blend them together.

    Beat the three large eggs inside a medium bowl and season after some freshly grated pepper. Set everything aside.

    Add 1 teaspoon salt towards the boiling water, add 350g spaghetti so when water returns towards the boil, prepare in a constant simmer, covered, for ten minutes or until al dente (just cooked).

    Squash 2 peeled plump garlic clove cloves using the blade of the knife, simply to bruise it.

    As the spaghetti is cooking, fry the pancetta using the garlic clove. Drop 50g unsalted butter right into a large fry pan or wok and, when the butter has melted, tip within the pancetta and garlic clove.

    Leave to prepare on the medium heat for around a few minutes, stirring frequently, before the pancetta is golden and crisp. The garlic clove has imparted its flavour, so remove it having a slotted spoon and discard.

    Keep your heat underneath the pancetta on low. Once the pasta is prepared, lift it in the water having a pasta fork or tongs and set it within the fry pan using the pancetta. Don’t worry if your little water drops within the pan too (you would like this to occur) and don’t toss the pasta water away yet.

    Mix the majority of the cheese along with the eggs, keeping a little handful back for sprinkling over later.

    Go ahead and take pan of spaghetti and pancetta from the heat. Now rapidly pour within the eggs and cheese. While using tongs or perhaps a lengthy fork, pick up the spaghetti therefore it mixes easily using the egg mixture, which thickens but doesn’t scramble, and things are coated.

    Add extra pasta cooking water to help keep it saucy (several tablespoons must do it). You don’t need it wet, just moist. Season after some salt, as needed.

    Make use of a lengthy-pronged fork to twist the pasta to the serving plate or bowl. Serve immediately after some sprinkling from the remaining cheese along with a grating of pepper. When the dish does obtain a little dry before serving, splash in certain more hot pasta water and also the glossy sauciness is going to be elevated.


    Monday, September 16, 2019

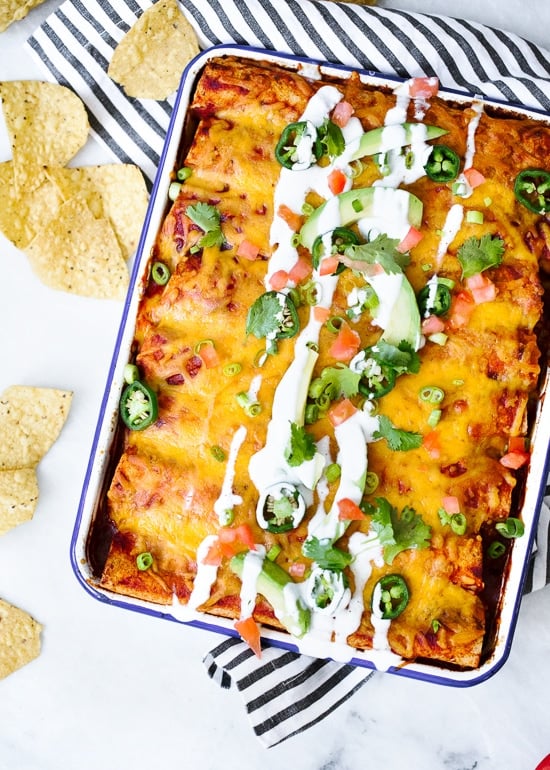
    Enchilada recipe

    Chicken enchiladas 2

    This simple chicken enchiladas recipe is undoubtedly an genuine Mexican food staple. Tender items of shredded chicken breast are rolled in flour tortillas and topped with a do-it-yourself enchilada sauce. The casserole is prepared until the cheeses is popular and melted.

    Poultry enchiladas is an easy casserole meal intended to feed a masses. Toned bright white beef is sauteed, shredded and tossed in strong seasoning for max flavoring inside of warmed flour tortillas. A realistic enchilada marinade is produced with a tomato based marinade, chipotle peppers, fowl broth, and seasonings to layer each and every serving.

    A combination of cheddar and Monterey Jack cheeses are scattered ahead, as well as the dish is cooked up until the cheese is warm and bubbly. It’s a satisfying food that could be prepped ahead of time for active weeknights or designed for unique activities like Cinco De Mayo.

    Steps To Make Chicken breast Enchiladas

    Poultry enchiladas really are a cooked casserole recipe made with 4 important parts.

    • Shredded Fowl:Sauteed chicken breast boobies are expert before and after cooking with a mix of cumin, paprika, sea salt, pepper, garlic herb, powder, and chili pepper.
    • Tortillas: 6-" rounded flour tortillas are casually charred within a pan or over the direct heat of the gasoline burner just for a few seconds to ensure they more pliable and include a smoky flavoring. Corn tortillas bring a gluten-cost-free replace.
    • Enchilada Sauce: It’s straightforward to make home made enchilada marinade. Crushed tomatoes, chipotle chilis in adobo sauce, chicken breast broth, cumin, chipotle chili natural powder for the smoky and somewhat hot and spicy flavoring.
    • Cheddar cheese: A mixture of 2 kinds of dairy products, distinct cheddar and Monterey Jack give the proper dissolved regularity.

    The heated tortillas get softly dipped from the enchilada sauce and after that filled up with poultry. Other components like diced green chilis or made corn can also be additional for more taste. The jammed tortillas are rolled and positioned seam aspect straight down within a baking meal, so they tend not to unlock when servicing.

    Right before cooking, two cups of cheddar cheese are layered on top of the enchiladas. In order to turn this plate before hand or come up with a fridge meal, this is actually the excellent spot to stop. The pan might be covered and refrigerated or frozen until finally ready to bake and assist.

    I’ve found out that within the casserole with foil and baking for approximately 20 minutes will keep the cheddar cheese very hot and dissolved. Preparing food without being covered to have an extended period dries out out your chicken breast and helps make the cheese more challenging in texture.

    These shredded poultry enchiladas are a family members-helpful meal everyone will devour! Serve some toppings around the area like sour product, tomatoes, cilantro, eco-friendly red onion, diced avocado or sliced jalapenos for added heating. Anytime I have left over roasted chicken breast, I prefer it in this particular dish to have an even faster meal.

    If you make this dish, make sure you tell me! Depart a remark, price it, and don’t overlook to tag a photo #jessicagavin on Instagram. I’d like to see what you come up with. Cheers, good friends!

    It’s essential to select the right kind of dairy products for casserole variety dishes. A better in moisture content company cheddar cheese, like cheddar and Monterey Jack, gives the ideal melt uniformity.

    Distinct cheddar is old longer and provides far more flavoring, whilst Monterey Jack is milder and slightly wonderful. The mix performs beautifully together for your enchiladas. Dust on gentle cheddar cheese like cotija or harder cheeses like Parmesan prior to serving.

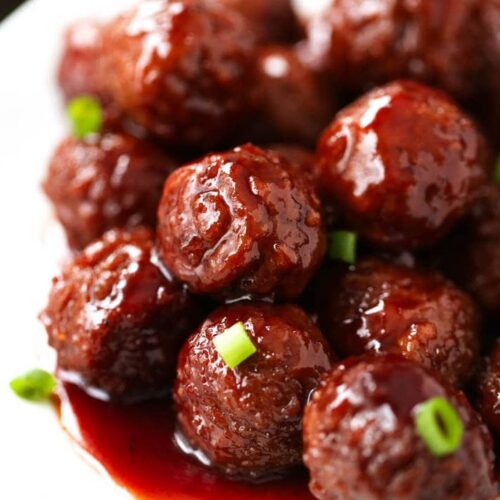
    Crockpot meatballs

    Crockpot meatballs

    Try these slow cooker meatballs to get a scrumptious household dish. Turkey mince can make lighter in weight meatballs which children love. They also freeze out effectively to help you set cook

    Nutrients and further facts

    Components

    Rapeseed oil

    If you prefer a light replacement for other cooking natural oils, rapeseed is a great decision and has…
    Onions are endlessly versatile plus an essential ingredient in countless quality recipes. Indigenous to Asia…

    The carrot, featuring its exclusive brilliant orange color, is amongst the most flexible root…
    One of the most ubiquitous herbal treatments in British cookery, parsley is additionally popular in Western and…

    While it's the regular Christmas time parrot, turkey is good to consume throughout every season, though…

    A spruce that's core to Hungarian cuisine, paprika is made by drying a certain sort of…


  • 1 garlic clove, crushed
  • mist of oil

  • Warmth the crock pot if required. Heating the oil in a low-put frying pan and put the onion, green beans, celery and garlic herb and fry lightly to get a second. Dump inside the passata, put the parsley and stir, then shift the good deal towards the slow cooker.

    To help make the meatballs, hint the mince into a huge pan. Add the oats, paprika, garlic clove and plenty of dark pepper, and blend almost everything with your fingers. Split the mixture into 20 piles about how big a walnut and roll each piece into a meatball. Spray or run a no-stay pan with some essential oil and delicately prepare food the meatballs right up until they start to dark brown.
    Put these to the tomato foundation and prepare on Lower for 5 hrs. Assist around rice or pasta if you want, or having a environmentally friendly greens.

    Friday, September 13, 2019

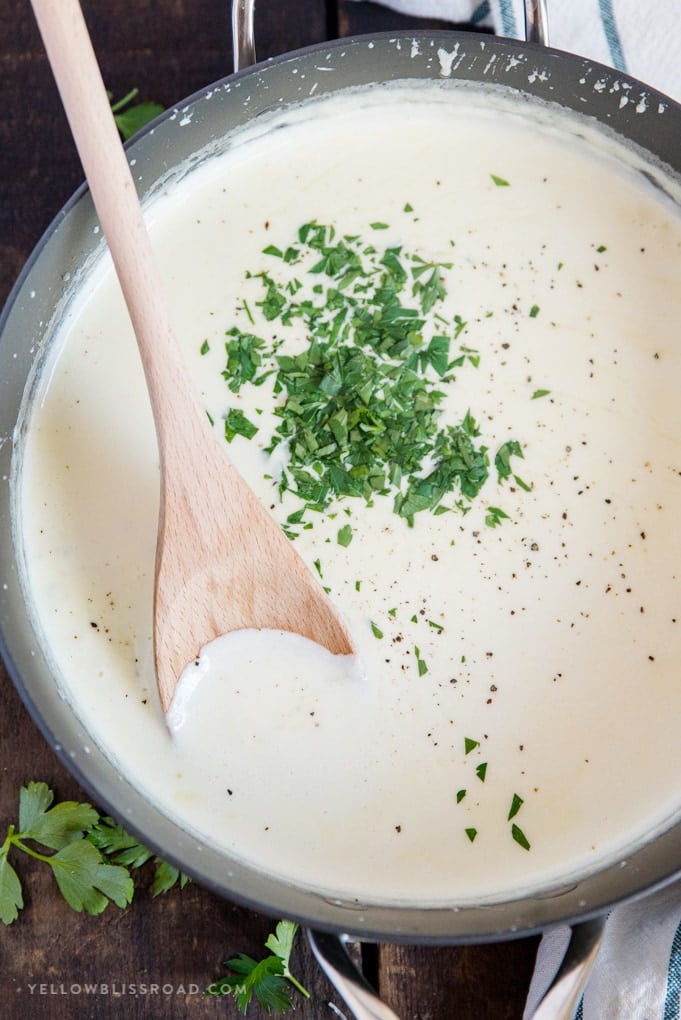
    Alfredo sauce

    Alfredo sauce

    Greatest Homemade Alfredo Marinade is abundant, creamy, and full of garlic clove parmesan flavoring! This Alfredo Sauce is not hard to help make and perfect with your favored pasta!

    Alfredo Sauce:

    Alfredo marinade is among my favorite items to have with a big bowl of spaghetti! It’s an incredibly rich and indulgent take care of for dinner. Furthermore, i adore that it only takes about 5-10-20 minutes to whip up a set! This recipe will generate about two cups of marinade overall. It can easily be doubled in case you are serving a masses or want added for in the future. The bottled Alfredo just doesn’t compare to this tasty homemade edition!

    Precisely what is Alfredo Sauce?

    Traditional Alfredo marinade is a simple white colored/product sauce. It is made of butter, hefty product, and parmesan cheeses. Whilst the authentic type is great, I basically want to put garlic clove, sea salt, pepper, and Italian seasoning to help make Alfredo sauce flavor even better!

    How to Make Alfredo Sauce:

    • The first task to earning Alfredo sauce would be to cozy your butter and cream inside a large saucepan above low temperature. You may allow it to simmer (although not boil) for roughly 2 moments.
    • After that, you will whisk within your garlic cloves and spices. Whisking continually for about 1 minute simply to allow the garlic cloves cook.
    • Finally, you are going to include your parmesan cheese and blend just before the cheese has melted as well as your marinade is easy.
    Remember that it is best to use newly grated parmesan cheddar cheese right from the block which means that your marinade isn’t grainy. I actually do not suggest utilizing the “shaker” design compartment grated cheeses with this menu.

    The Parmesan will thicken this marinade up. Whether it isn’t very dense adequate, permit the sauce to face for two-3 moments before helping.
    If you enjoy making your own personal noodles marinade in your house, make sure to consider my Straightforward Do-it-yourself Pesto too!

    Bisquick sausage balls

    Bisquick sausage balls 1

    These Effortless Bisquick Sausage Balls certainly are a classic holiday break appetizer that are an ideal tasty celebration mouthful that the company will be unable to give up eating!

    If you are searching for this classic sausage ball dish that you simply matured ingesting – this can be it!
    Some recipes, like vacation recipes you matured having, you simply desire them to flavor like the things you got growing up.
    For me personally, which is Bisquick Sausage Balls. Nevertheless, I truly do prefer to gown them with selfmade sauces!
    With this sausage balls recipe, I created two simple and easy , speedy sauces: Darling Mustard and Rich and creamy Wonderful Chili Sauce.

    Sausage Balls created using Bisquick

    The very first sausage balls dishes had been made using bisquick and it is how many of us matured eating them!
    It will make the sausage balls recipe come together so quickly and easily with just some ingredients.
    If you wish to make the personal home made bisquick mixture, keep to the listed below recommendations:
    Home made Bisquick Menu
    3 servings all-objective flour
    1 1/2 tablespoons baking powder
    1/2 tablespoon sea salt
    1/2 mug vegetable shortening

    1. Sift flour, cooking powder and sodium 3 x into a big bowl.
    2. Minimize in shortening with a pastry mixer right up until mixture appears like fine crumbs.
    3. Utilization in below sausage soccer ball recipe where by bisquick is known as for!

    Sausage Balls Elements

    Sausage balls are typically made using floor pork. I like to use a mixture of spicy pork sausage and standard pork sausage.
    It maintains them seasoned and delicious, but not also spicy for that typical person.
    Nonetheless, Indeed, you may use all hot soil pork sausage so they are hot and spicy sausage balls or all plain pork sausage to avoid any minor temperature.
    You will also want to use good razor-sharp cheddar dairy products and milk to ensure they are wet!
    And finally, I always give a a little Worcestershire marinade and Italian seasoning to provide a range of taste.

    How to make Bisquick Sausage Balls

    These Bisquick Sausage Balls couldn’t be any much easier to whip together and the kids enjoy to assist roll them!
    All that you should do is combine all components in the large container (a hand blender or stand up blender get this much easier).
    Then roll the mixture together with your fingers into golf soccer ball size balls and put over a preparing page.
    Make them for 25 to 25 moments and they are generally ready to serve!

    Is it possible to prepare sausage balls before hand?

    Of course! Not merely are these sausage balls delicious, but they are another wonderful make ahead bash appetizer.
    You are able to roll them and put them on cookie sheets after which place them cling place.
    Store from the freezer for about 24 hours before the bash and burst them to the stove once your friends show up.

    Can you freeze sausage balls?

    Also, YES! You are able to lock uncooked sausage balls in an air-tight box for up to 4 months.
    Place the sausage balls over a baking sheet in the fridge and as soon as they’re frosty, it is possible to transfer them to a ziplock freezer handbag.
    While you are willing to bake them, take them out from the freezer and allow them to thaw for 20 to 30 minutes or so and then prepare.
    If you are looking for the best timeless sausage balls menu you grew up having every Xmas time of year, here is the recipe you might have been seeking!
    Your invited guests will really enjoy these very little appetizers and you will definitely be surprised at how quickly they disappear altogether. Its a very important thing this formula will make a lot.
    Once you do this Bisquick Sausage Tennis ball Menu, you should abandon a comment listed below letting me know your opinion!

    Thursday, September 12, 2019

    Pulled pork


    Ingredients

    Also known as capsicums, bell peppers, sweet peppers or by their colours, for example red and…
    Cider is an alcoholic beverage made from the fermented juice of apples. Apple orchards were…
    One of the most versatile types of meat, pork is economical, tender if cooked correctly, and…


  • a mugful of a good smoky barbecue sauce
  • soft white rolls
  • coleslaw (see 'Goes well with…' below)

  • Mix together 2 tsp each smoked paprika, groundcumin and pepper, and brown sugar, plus 1 tsp salt. Rub over the 2.5kg boneless shoulder of pork.
    Put the pork in a big casserole dish, skin-side up, and pour in 2 medium mugfuls of cider.
    Cover with a cook and lid in the oven at 150C/130C fan/gas 2 for anywhere between 8 and 4 hrs until falling apart. If it does, add another mugful of cider, check every few hours in case it gets dry –.
    Take it out of the oven and put the meat in a big dish, leaving the liquid in the casserole.

    Cut the skin off, then shred the meat using two forks. Ditch any fatty bits, and skim any excess fat off the surface of the sauce.
    Add a mugful of a good smoky BBQ sauce to the casserole, mix it in, then ladle some into a bowl for dipping.
    Put the pulled pork back in the casserole with the juices so it stays moist. Season to taste. Can be made one day ahead.
    Serve in soft white rolls with coleslaw and the bowl of juices on the side for ‘French dipping’ the sandwich while you’re eating.

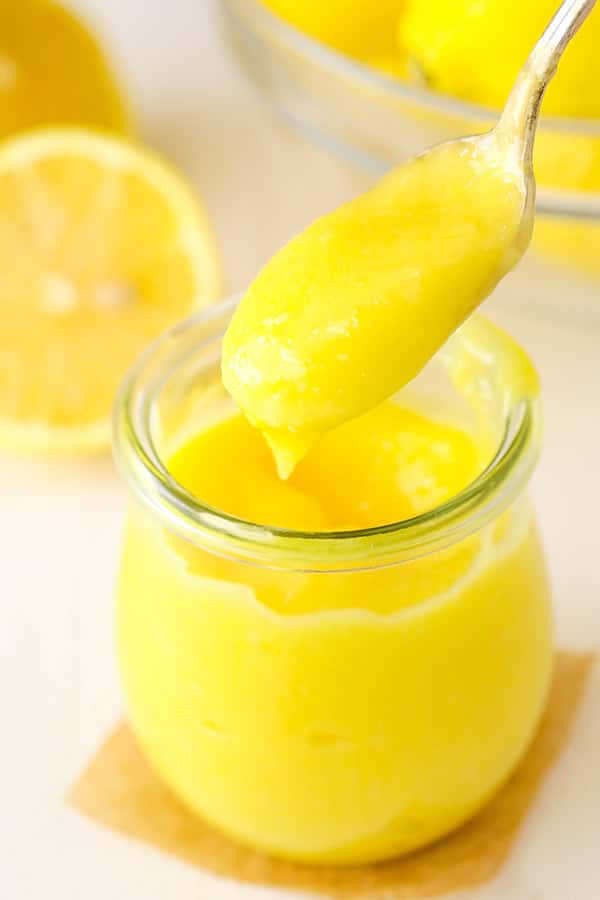
    Lemon curd

    Lemon curd

    less than 30 mins

    Makes one 500g/1lb 2oz (large) jar or two 250g/9oz (small) jars
    Homemade lemon curd is quick and easy and so much more mouthwatering than the shop-bought variety.
    less than 30 mins

    Ingredients

    Put the lemon juice and zest, the sugar and the butter into a heatproof bowl. Sit the bowl over a pan of gently simmering water, making sure the water is not touching the bottom of the bowl. Stir the mixture every now and again until all of the butter has melted.

    Lightly whisk the eggs and egg yolk and stir them into the lemon mixture. Whisk until all of the ingredients are well combined, then leave to cook for 10-13 minutes, stirring every now and again, until the mixture is creamy and thick enough to coat the back of a spoon.
    Remove the lemon curd from the heat and set aside to cool, stirring occasionally as it cools. Once cooled, spoon the lemon curd into sterilised jars and seal. Keep in the fridge until ready to use.
    To sterilise jars, wash the jars in very hot, soapy water or put through the hot cycle of a dishwasher. Place the jars onto a baking tray and slide into an oven set to 160C/325F/Gas 3 for 10-15 minutes.

    Wednesday, September 11, 2019

    Ribs recipe

    Ribs recipe
    This post may contain affiliate links. Please read my disclosure policy.
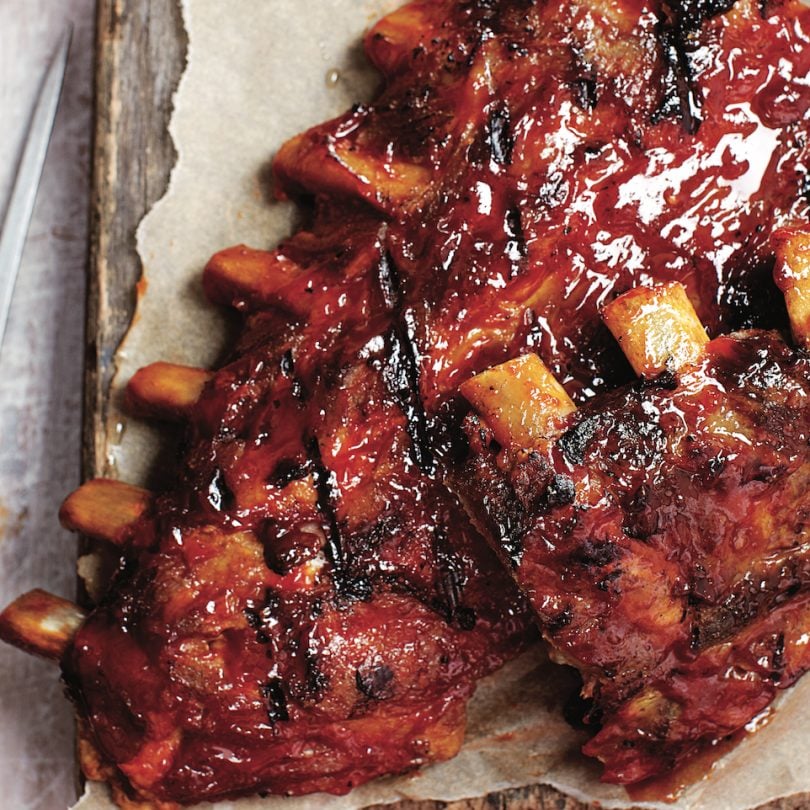
    Ribs in the oven are easy to come and make out perfectly tender every single time. These barbecue ribs have been dubbed the “best ribs ever” by my friends and family every time I make them.
    I start by cooking seasoned baby back ribs in the oven at a low temperature and then flash grill them with either salt & pepper or my fave quick barbecue sauce below. We serve these with corn on the cob and of course Classic Crock and Coleslaw Pot Baked Beans! Once you try this method, it’ll become your go-to!
    Perfectly tender finger-lickin’ ribs are actually pretty easy to make! No matter the weather, because no barbecue is actually required, you can whip up a batch of these delicious barbecue ribs! This recipe has been perfected over the years from my Mom (who is literally the best cook on the entire planet! ).
    I cook these oven ribs often because they are definitely a family favorite! We make them two ways, I love mine all sticky with barbecue sauce… and my husband likes his with salt and pepper! You can do both ways at the same time!
    Before grilling, we always cook our ribs slowly to make them tender… often people BOIL their ribs. Boiling ribs will make all their succulent flavor seep out into the water making them flavorless! Try this method below and you will NEVER go back to boiled ribs again!

    How to Cook Ribs in the Oven

    Baby Back (or Pork Back Ribs) are the best choice, they cook to tender perfection. Although the cost is slightly more, this is one place I feel is worth it. In this recipe, the ribs are roasted low and slow to get the most melt in your mouth tender meat. Before cooking


  • Rinse your ribs in cold water and dab dry,


    1. Peel the thin silvery skin off the back. (They often have small bone shards).
    2. Add your rib rub and massage into the meat.
    3. Place meat down and cover with onion and garlic.
    4. Seal and bake at a low temperature until tender.
    5. Grill or broil to finish. If they are not tender, they need MORE time,

    After roasting. After a couple of hours, I pull a little piece off to test. Add another 20-30 minutes if it’s not melt in your mouth tender. If they are ready ahead of time, you can turn the oven off and let them sit for up to 1 hour if you don’t open the oven.

    How Long to Cook Ribs in the Oven

    My preferred method is a low temperature for a longer period of time. I most often cook baby back ribs in the oven at 275°F for about 2-2.5 hours.
    If you’re looking to cook ribs quickly, Instant Pot Ribs are a great option. They come out tender and delicious and cook in about 25 minutes!

    Recipes with chicken

    Recipes with chicken
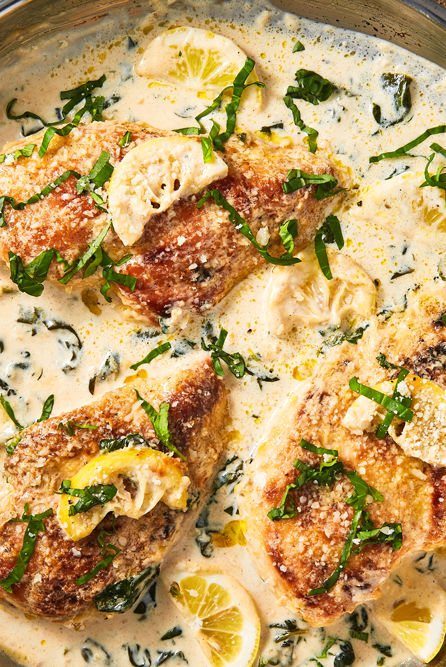
    This is our most dangerously addictive sauce EVER. Once you start, you literally can't stop. Once we can almost guarantee you'll be hooked after making it. (Beware: This is pretty much a gateway recipe to Crack Chicken Tacos and Crack Chicken Dip—which are even more insane.)
    panko bread crumbs
    Freshly ground black pepper
    Juice of 2 limes
    Ranch dressing, for serving (optional)
    1. Preheat oven to 425°. In a large resealable plastic bag, combine flour and chicken tenders and shake until fully coated.
    2. Set up a dredging station: In one shallow bowl, put bread crumbs, and in another shallow bowl, whisk together eggs and 2 tablespoons water. Dip chicken in egg mixture, then coat in bread crumbs. Transfer to prepared baking season and sheet generously with salt and pepper.
    3. Bake until crispy and golden, 20 to 25 minutes.
    4. Meanwhile, in a small saucepan over low heat, whisk together barbecue sauce, brown sugar, lime juice, and garlic powder. Simmer 5 minutes.
    5. In a large bowl, toss baked chicken in sauce until coated. Serve with ranch, if desired.
    GET CRACKIN’! This sauce makes everything it touches infinitely more addictive. Try it on Brussels sprouts, pork chops, and burgers.

    Grilled cauliflower

    Grilled cauliflower
    Nutritional 

    Calories 117  
    Fat      7g    
    Carbs 12g  
    Protein 4g    


    Saturated Fat 1g
    Cholesterol 0mg
    Sodium 1245mg
    Total Carbohydrate 12g
    Dietary Fiber 5g
    Protein   4g
    Calcium 52mg

    Grilling is one of the best ways I know of to cook cauliflower. It's also one of the easiest. The only part of the job that's even remotely tricky is breaking down the cauliflower.
    I like to trim off the remove and stem as many of the leaves as possible, and then go around the bottom using the point of my knife to remove whole florets from the stalk. Any huge florets can be halved or even quartered so that they are about bite-sized.

    It's best if you slice down the center of the stem of the floret and then gently break it apart rather than slicing all the way through. Smaller florets can be left intact.
    Chili powder adds a bit of a kick (but be careful not to confuse chili powder with cayenne pepper, which is much hotter), or you could substitute smoked paprika.